The buyer's seat, not the engineer's
There's already a good article on this site about the seven steps of cosmetic packaging development. It's written from the engineer's side of the table — how a factory takes a concept through structural design, prototyping, and mass production. Read it; it's accurate.
This is the other side of the table. I sit on the sales side, and most of my week is spent with people placing their first custom order — indie founders, contract manufacturers bidding on a retailer's private label, a buying office for a chain that wants its own line. They all ask versions of the same three questions: what do I need to have ready, what will you need from me, and what's going to slow this down?
So here's the map I wish someone had handed me when I started in this trade. Six stages, and at each one, what you bring and what tends to go wrong.
Stage 1: Preparation — the four things I ask for first
Before any drawing exists, I need four answers from you.
Dimensions and capacity. Actual numbers, not "similar to a 30ml serum." Diameter and fill volume, or the reference product you're replacing. If you only have the product and no numbers, tell me and we'll measure together — but this is the slowest way to start.
Your formula's character. Is it oil-based, water-based, high in essential oils or actives? This decides the material. An oil-heavy formula pushes us toward barrier laminates; a water-based one gives us cheaper options. I can't count the times a buyer told me "it's just a cream" two weeks after telling me the tube was deforming in a hot warehouse.
Your retail price. I know it feels odd to hand a packaging salesperson your pricing. But working backward from shelf price to packaging budget is how professionals source. If your product retails at $28, packaging that costs like it belongs on a $9 product is the wrong packaging in both directions.
Quantities and timing. First order and your honest forecast. I'd rather hear "3,000 now, 20,000 a year if it works" than a made-up big number — the second one gets you quoted into a line that doesn't fit your reality.
Bring those four things to the first conversation and you've already skipped the most common two weeks of back-and-forth.
Stage 2: The dieline — what it is and who draws it
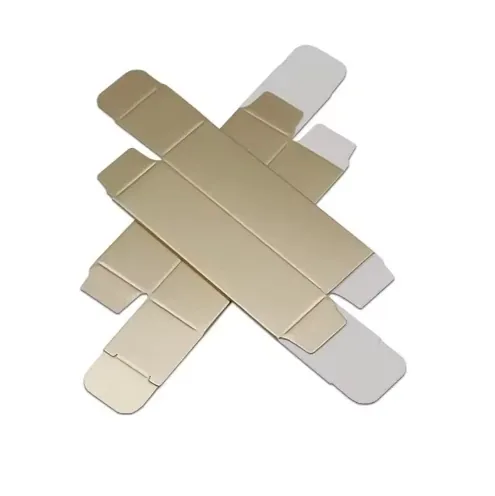
A packaging dieline is the flat, unfolded blueprint of your package: every cut line, fold line, and glue flap, drawn to scale. For a folding carton or a rigid magnetic closure gift box, the dieline is the single source of truth for the printer, the die-cutter, and your designer.
Who provides it depends on the package. For stock molds and standard formats, we supply the dieline — ask for it early, before your designer starts composing artwork, because everything from logo placement to the position of the ingredient panel lives inside those lines. For fully custom structures, our structural engineers draw it after the brief, and you confirm it before anything moves forward.
What to check when you review a dieline, even if you're not a print professional:
- That your product's actual dimensions match the internal dimensions — not the ones from the brief, the ones from the measuring caliper.
- Bleed: artwork that should run to the edge extends past the cut line, typically about 3mm, so tiny cutting shifts don't leave white slivers.
- Tolerance: a finished box will vary by about ±0.5mm across a production run. If your design has elements that must align across panels, they need to tolerate that. If they can't, the design changes now, not after printing.
The thing that stalls projects here: treating dieline confirmation as a formality. Sign it like it matters, because it's the last cheap place to fix an error.
Stage 3: Artwork files — the checklist I send every new client
I have a standard email for this stage. Here's what's in it:
- Vector files. Ai or print-ready PDF. PNGs exported from Canva or screenshots of your website are not print files. If your logo only exists as a small JPEG, budget an hour with a designer to rebuild it before we start.
- Fonts converted to outlines. If we don't have your font license and your file does, the text reflows on our system and your carefully kerned tagline breaks.
- Pantone numbers for brand colors, not "the blue from my packaging mood board." Pantone is the only language both our prepress team and your brand manager speak.
- Final color count. This decides the plates and the price. Our offset lines run up to 6 colors, which covers almost every cosmetic brand I've worked with, but I need the count locked before quoting becomes a promise.
One warning from experience: artwork is where most first orders lose their first two weeks. Not because anyone is slow — because everyone assumed someone else had the final logo version.
Stage 4: Sampling — three ways to see your package before production
This is the stage buyers underestimate most.
3D renderings and digital proofs. Fast and cheap. Good for confirming layout, text position, and general look. But a render on your laptop screen is not a color reference — screens glow, ink doesn't. I've seen founders approve a render twice and reject the physical sample twice over the same gold. The render is a blueprint, not a promise.
Physical samples — digital or hand-built. For boxes, a digital sample or a handmade prototype from the actual dieline shows you structure, size, and feel. For tubes and bottles, a blank or digitally printed sample shows you the shape in your hand. What neither reliably does is guarantee final color, because they don't run on the production press.
Press proofs and the golden sample. The real thing: your artwork on the actual production machine, with the actual inks and material. It costs more and it's the one worth paying for on a hero SKU. Whatever sample you approve becomes the golden sample — the reference your production order is judged against.
My advice for a first order: digital proof to check layout, one physical sample to check structure and feel, and a press check on color if the order is big enough that a color miss would hurt. Skip the last one on a test SKU; never skip it on your flagship.
| Sample type | Shows reliably | Does not guarantee | Best used for |
|---|---|---|---|
| 3D render / digital proof | Layout, text position, general look | Color — screens glow, ink does not | Fast layout sign-off |
| Physical sample (digital or hand-built) | Structure, size, feel | Final press color | Structure and tactile checks |
| Press proof / golden sample | Real press color and finish on the real machine | Nothing — this becomes the reference | Hero SKUs and orders big enough that color misses hurt |
Stage 5: Production and QC — what actually happens after you approve
Once the golden sample is signed, the machine doesn't just run your order and guess. There are checkpoints, and you should know they exist.
At the start of the production run, operators pull first articles and compare them against the golden sample — color, registration, dimensions, finish. During the run, in-line inspection continues. At the end, a final inspection samples finished goods against an AQL plan — we work to ISO 2859-1, the standard sampling procedure most serious manufacturers use, so that "inspected" means something specific rather than "someone glanced at a pallet."
You are allowed to be part of this. Some clients hire a third-party inspector to visit before shipment; I encourage it for first orders even when we run it ourselves. A good factory has nothing to fear from an inspector and everything to gain from a relaxed client.
Where first-time buyers go wrong here: changing their mind after the golden sample. "Small tweak" after approval means a new approval cycle, and sometimes new plates. Decide before, not during.
Stage 6: Freight and documents — the boring part that ruins launches
Production done, samples approved, and then the order sits in a warehouse because nobody thought about shipping marks. Don't let that be you.
What you'll need lined up:
- Shipping marks and packing details. Carton dimensions, gross and net weights, carton count, and your shipping mark layout. We'll propose a standard; confirm it against your warehouse and your forwarder's requirements.
- Commercial invoice and packing list. Standard export documents; your customs broker will tell you any market-specific requirements.
- FSC documentation, if it applies. If your paper packaging is FSC-certified and you want to claim it, the chain-of-custody paperwork needs to travel with the shipment — we hold FSC chain-of-custody certification on our paper lines, and the claim only works if the documents do.
- A freight decision made weeks earlier. See Stage 1: quantities and timing. Everything about this stage was decided back then, whether you participated or not.
The one habit I'd tattoo on every first-time buyer: build two weeks of slack between production completion and your launch date. Not because factories are slow — because customs, weather, and freight schedules don't care about your launch.
The short version
Bring dimensions, formula character, retail price, and honest quantities to the first call. Confirm the dieline like a contract. Send vector artwork with Pantone numbers and outlined fonts. Pay for the right sample at the right stage. Know that QC runs to a standard, not to a vibe. Prepare shipping documents while production runs, not after.
That's the whole map. If you're about to place a first custom order and want a second pair of eyes on your timeline — or you'd rather skip a stage because your brief is ready now — send it over. A spec sheet in an email is how most of my best client relationships started.
| Stage | What you bring | Where projects usually stall |
|---|---|---|
| 1. Preparation | Dimensions, formula character, retail price, honest quantities | Vague briefs and made-up volumes |
| 2. Dieline | Measured product dimensions, not brief numbers | Treating confirmation as a formality |
| 3. Artwork | Vector files, outlined fonts, Pantone numbers, final color count | Everyone assumed someone else had the final logo |
| 4. Sampling | A decision on which proofs to pay for | Changing minds after the golden sample |
| 5. Production & QC | The approved golden sample; an inspector if you want one | "Small tweaks" mid-run |
| 6. Freight & documents | Shipping marks, invoice, FSC papers — prepared during production | The freight decision made two weeks before launch |